Building a Serverless Project with Lambda Function, SNS, S3, and DynamoDB


Introduction:
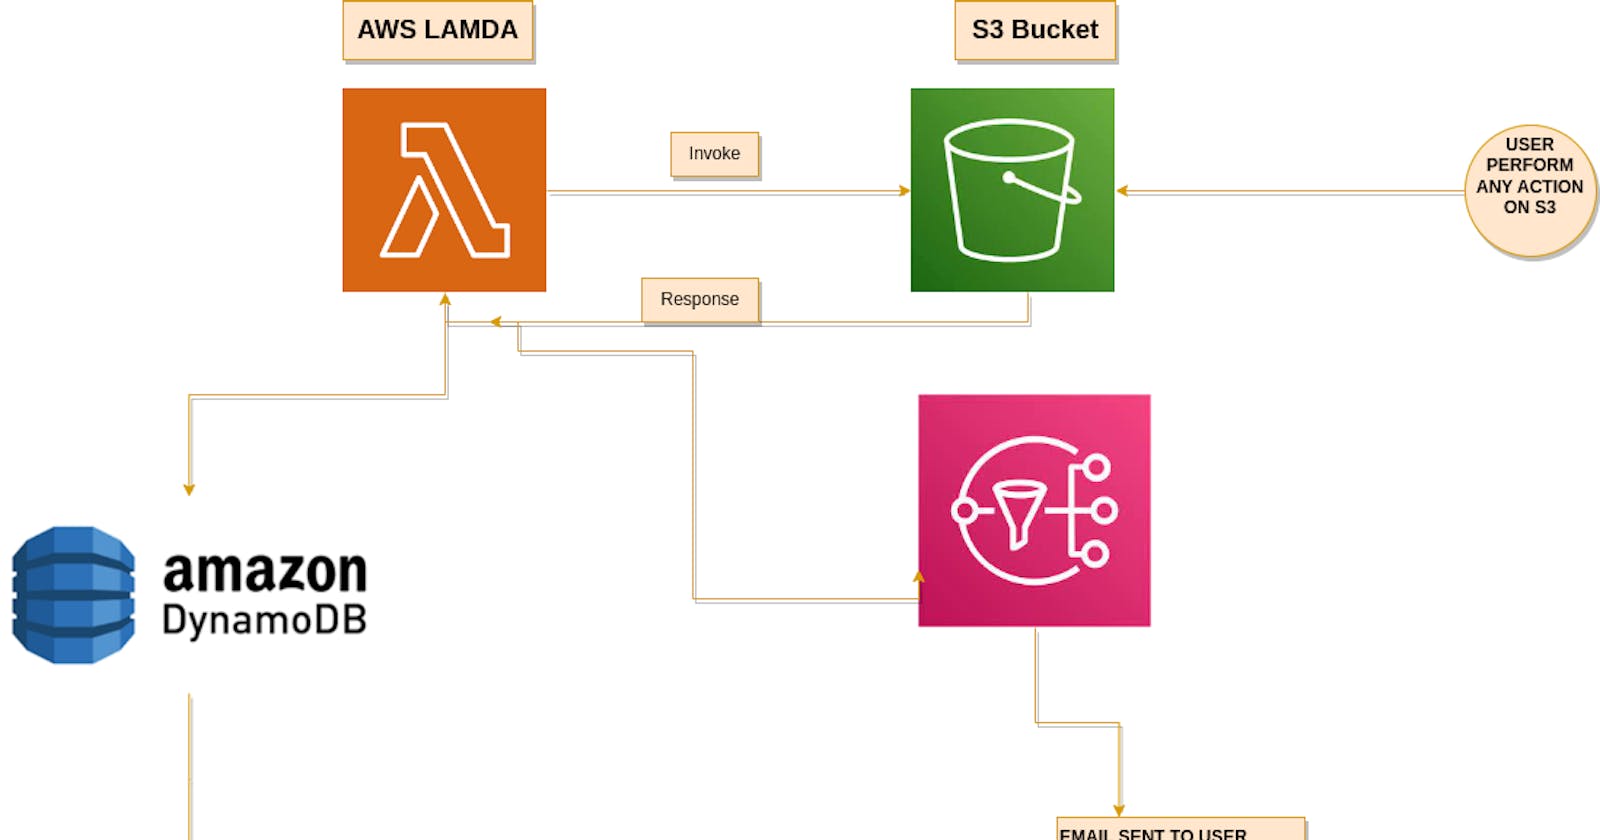
Serverless architecture is becoming more popular among developers as it provides a scalable and cost-effective solution for building web applications. In this blog post, we will explore how to build a serverless project using the AWS Lambda function, SNS, S3, and DynamoDB.
Prerequisites:
Before we begin, you'll need to have an AWS account set up and have basic knowledge of IAM USER, AWS Lambda, SNS, S3, and DynamoDB. If you don't have an AWS account, you can create one for free.
Step 1: Create a role
Create a policy role which has the following access -
Full DynamoDb Acess
Full SNS access
Step 2: Create an S3 Bucket
The next step is to create an S3 bucket. In the AWS Management Console, navigate to the S3 service and create a new bucket. Give it a name and keep the default settings. Once you've created the bucket, copy the ARN as you'll need it later.
if you don't know how to create this bucket then read this blog -
Step 3: Create an SNS topic
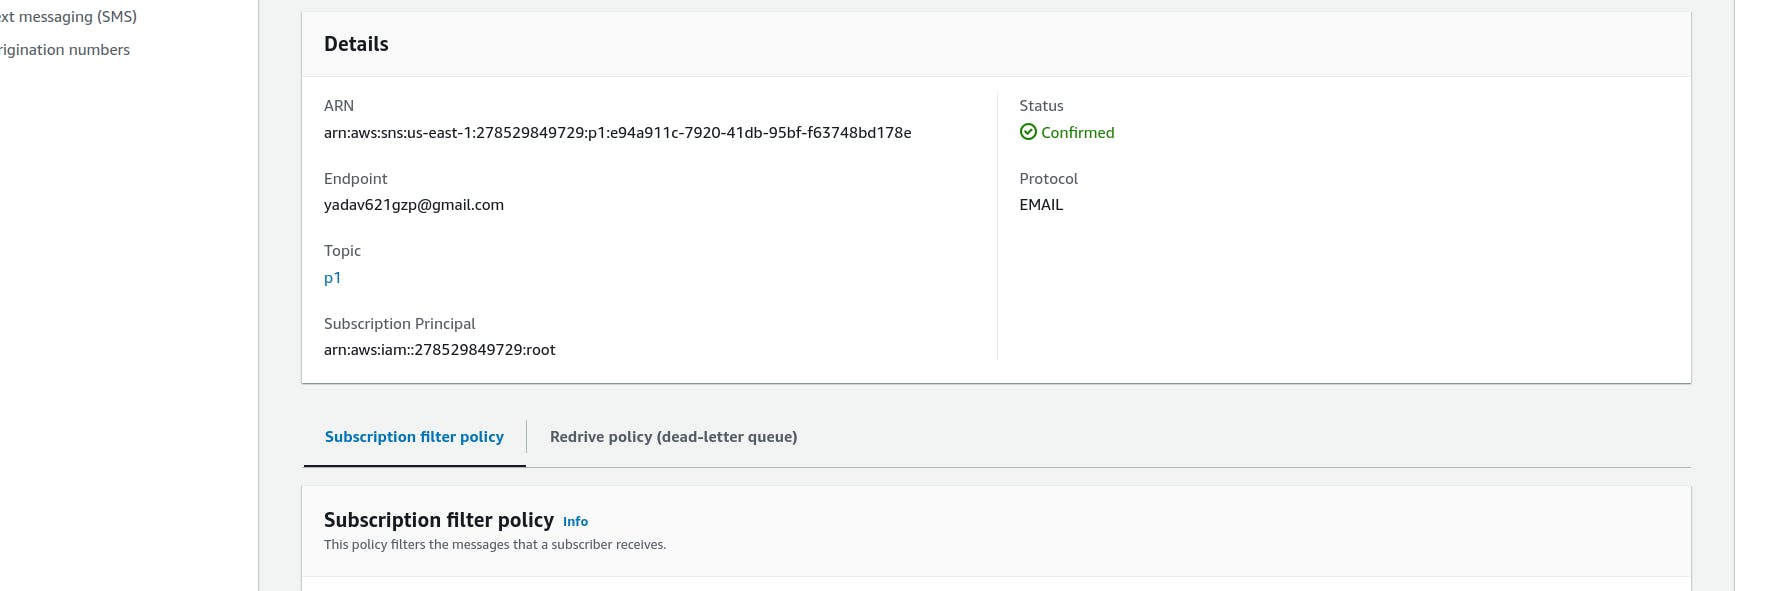
The next step is to create an SNS topic. In the AWS Management Console, navigate to the SNS service and create a new topic. Give it a name and keep the default settings. Once you've created the topic, copy the ARN as you'll need it later.
Note - Select the advance service and email as the endpoint.
Step 4: Create a DynamoDB Table
The next step is to create a DynamoDB table. In the AWS Management Console, navigate to the DynamoDB service and create a new table. Give it a name and choose the partition key. Once you've created the table.
Note - Copy the partition key and table name. (Very important)

Step 5: Create a lambda function
The first step in building a serverless project is to create a Lambda function. In the AWS Management Console, navigate to the Lambda service and create a new function. Give it a name, and choose the runtime as python3.7.
Don't forget to attach the role that you have created in the beginning.
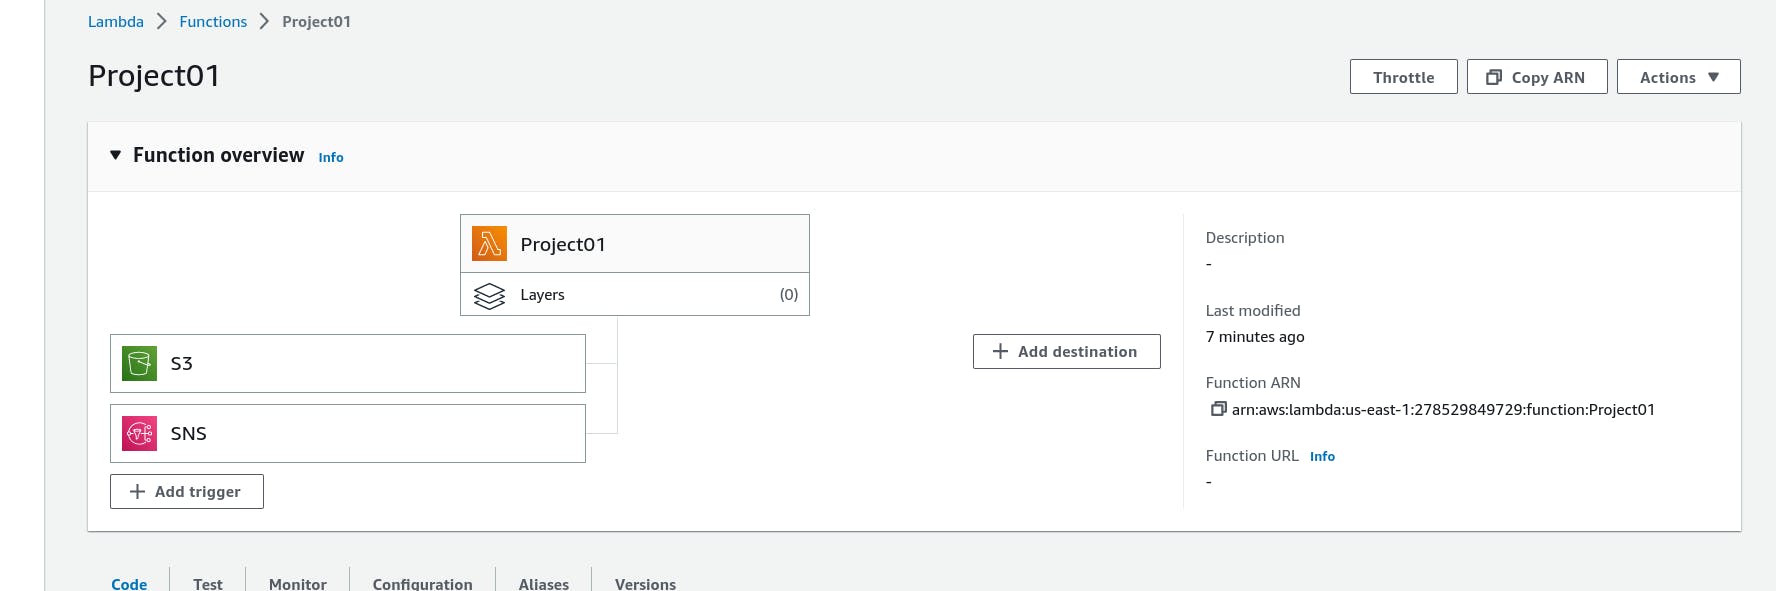
After creating the lambda here comes the main part. Attach the S3 bucket and SNS to the trigger section after adding it looks something like this. But wait one question, why we are not adding the DynamoDb? The answer is simple because dynamoDb is already attached in policy role and int code we will see how it is possible.
After doing this it's time to write the code -
import boto3
from uuid import uuid4


topic_arn = "arn:aws:sns:us-east-1:278529849729:p1"
def send_sns(message, subject):
    try:
        client = boto3.client("sns")
        result = client.publish(TopicArn=topic_arn, Message=message, Subject=subject)
        if result['ResponseMetadata']['HTTPStatusCode'] == 200:
            print(result)
            print("Notification send successfully..!!!")
            return True
    except Exception as e:
        print("Error occured while publish notifications and error is : ", e)
        return True


def lambda_handler(event, context):
    s3 = boto3.client("s3")
    dynamodb = boto3.resource('dynamodb')
    for record in event['Records']:
        bucket_name = record['s3']['bucket']['name']
        object_key = record['s3']['object']['key']
        size = record['s3']['object'].get('size', -1)
        event_name = record ['eventName']
        event_time = record['eventTime']
        dynamoTable = dynamodb.Table('project01db')
        dynamoTable.put_item(
            Item={'id': str(uuid4()), 'Bucket': bucket_name, 'Object': object_key,'Size': size, 'Event': event_name, 'EventTime': event_time})

        from_path = "s3://{}/{}".format(bucket_name, object_key)
        print("from path {}".format(from_path))
        message = "The file is uploaded at S3 bucket path {}".format(from_path)
        subject = "Processes completion Notification"
        SNSResult = send_sns(message, subject)
        if SNSResult :
            print("Notification Sent..")
            return SNSResult
        else:
            return False
topic_arn paste the same arn that you have copied during the SNS building process.
dynamoTable fill in the table name that you have copied during the DynamoDb creation.
In `item` section replace id with the partition key that you have created during DynamoDb.
After doing all this it's time to run and deploy our application.
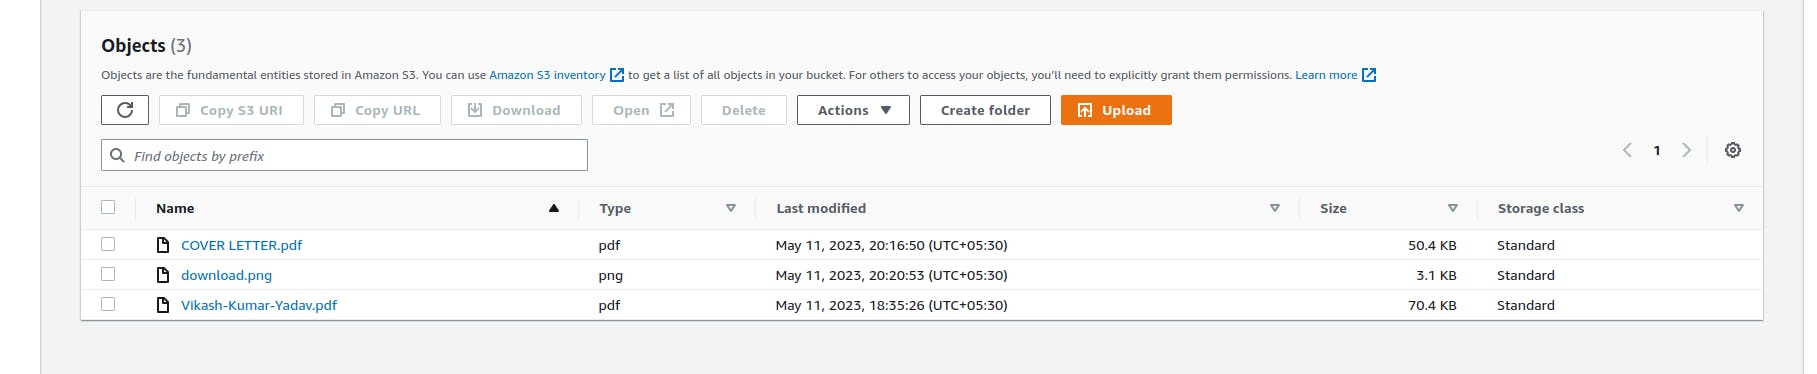
Upload something in the S3 bucket as shown below I uploaded the Cover letter item.
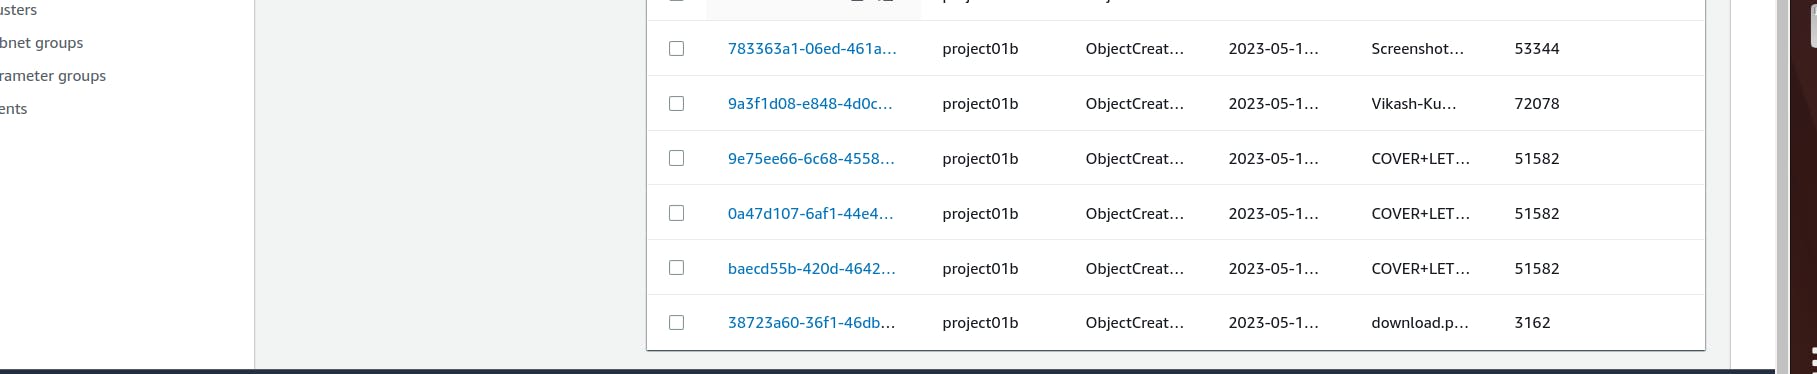
after uploading head over to the item section in the dynamo table you will see the item added with all the information in the table.
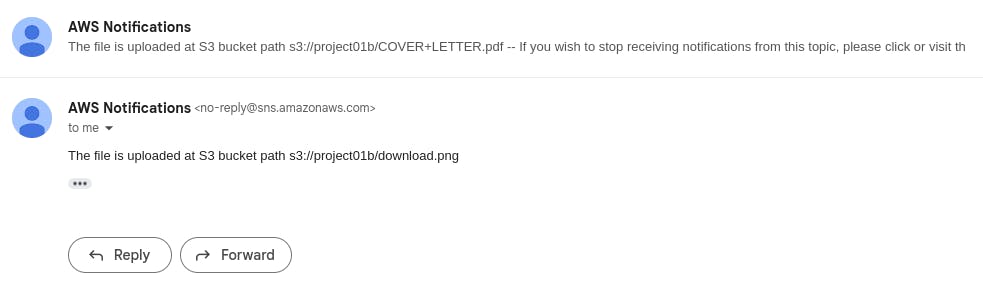
head over to the email and check the notification alert.
Congratulations on successfully building your Serverless Project with Lambda Function, SNS, S3, and DynamoDB! 🎉👏🚀 We hope this project has helped you to gain a deeper understanding of these technologies and their applications. Keep up the great work! 💪
GitHub repo -> https://github.com/Vikash-8090-Yadav/AWS-Serverless-Project