

Introduction:
In this guide, we'll walk you through the process of hosting a static web3 site on AWS using EC2 and S3. By the end of this tutorial, you'll have a fully functional website hosted on AWS that can be accessed by anyone on the internet.
Prerequisites:
Before we get started, you'll need to have the following:
An AWS account
Basic knowledge of web development
Your website files ready to upload
Create an EC2 instance
EC2 essentially creates virtual machines (instances) that you can use to perform tasks from Linux, Windows, or Ubuntu machines of your choice.
Amazon Elastic Compute Cloud (EC2) is a web service that offers resizable compute capacity in the cloud. In other words, it allows you to rent virtual servers (known as instances) to run your applications and services.
With EC2, you have the option to choose from a variety of instance types, including Linux, Windows, and Ubuntu machines. You can also specify the amount of CPU, memory, storage, and networking capacity that your instance requires.
In addition, EC2 provides various features such as auto-scaling, load balancing, and security groups to ensure that your applications are highly available, scalable, and secure.
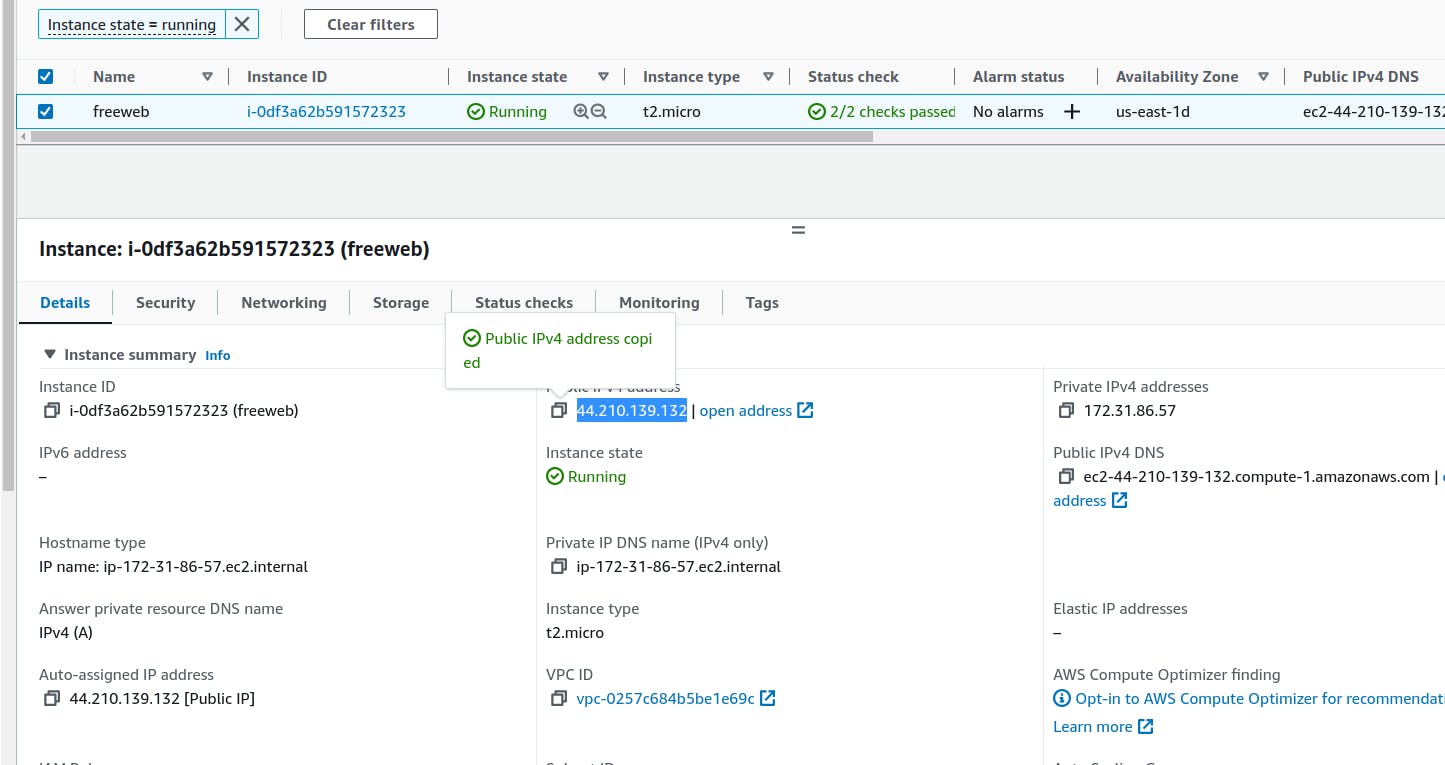
Below is an image of the EC2 console, showing the public IP address of the instance that I have created:
Configuring the S3 bucket for Static Website
To start fresh, let's head to the top search bar on the AWS consile and search for S3 again. Click on the S3 service. You will see the S3 bucket page and the S3 resources as follows:
You can see your bucket name here. Click on your bucket.
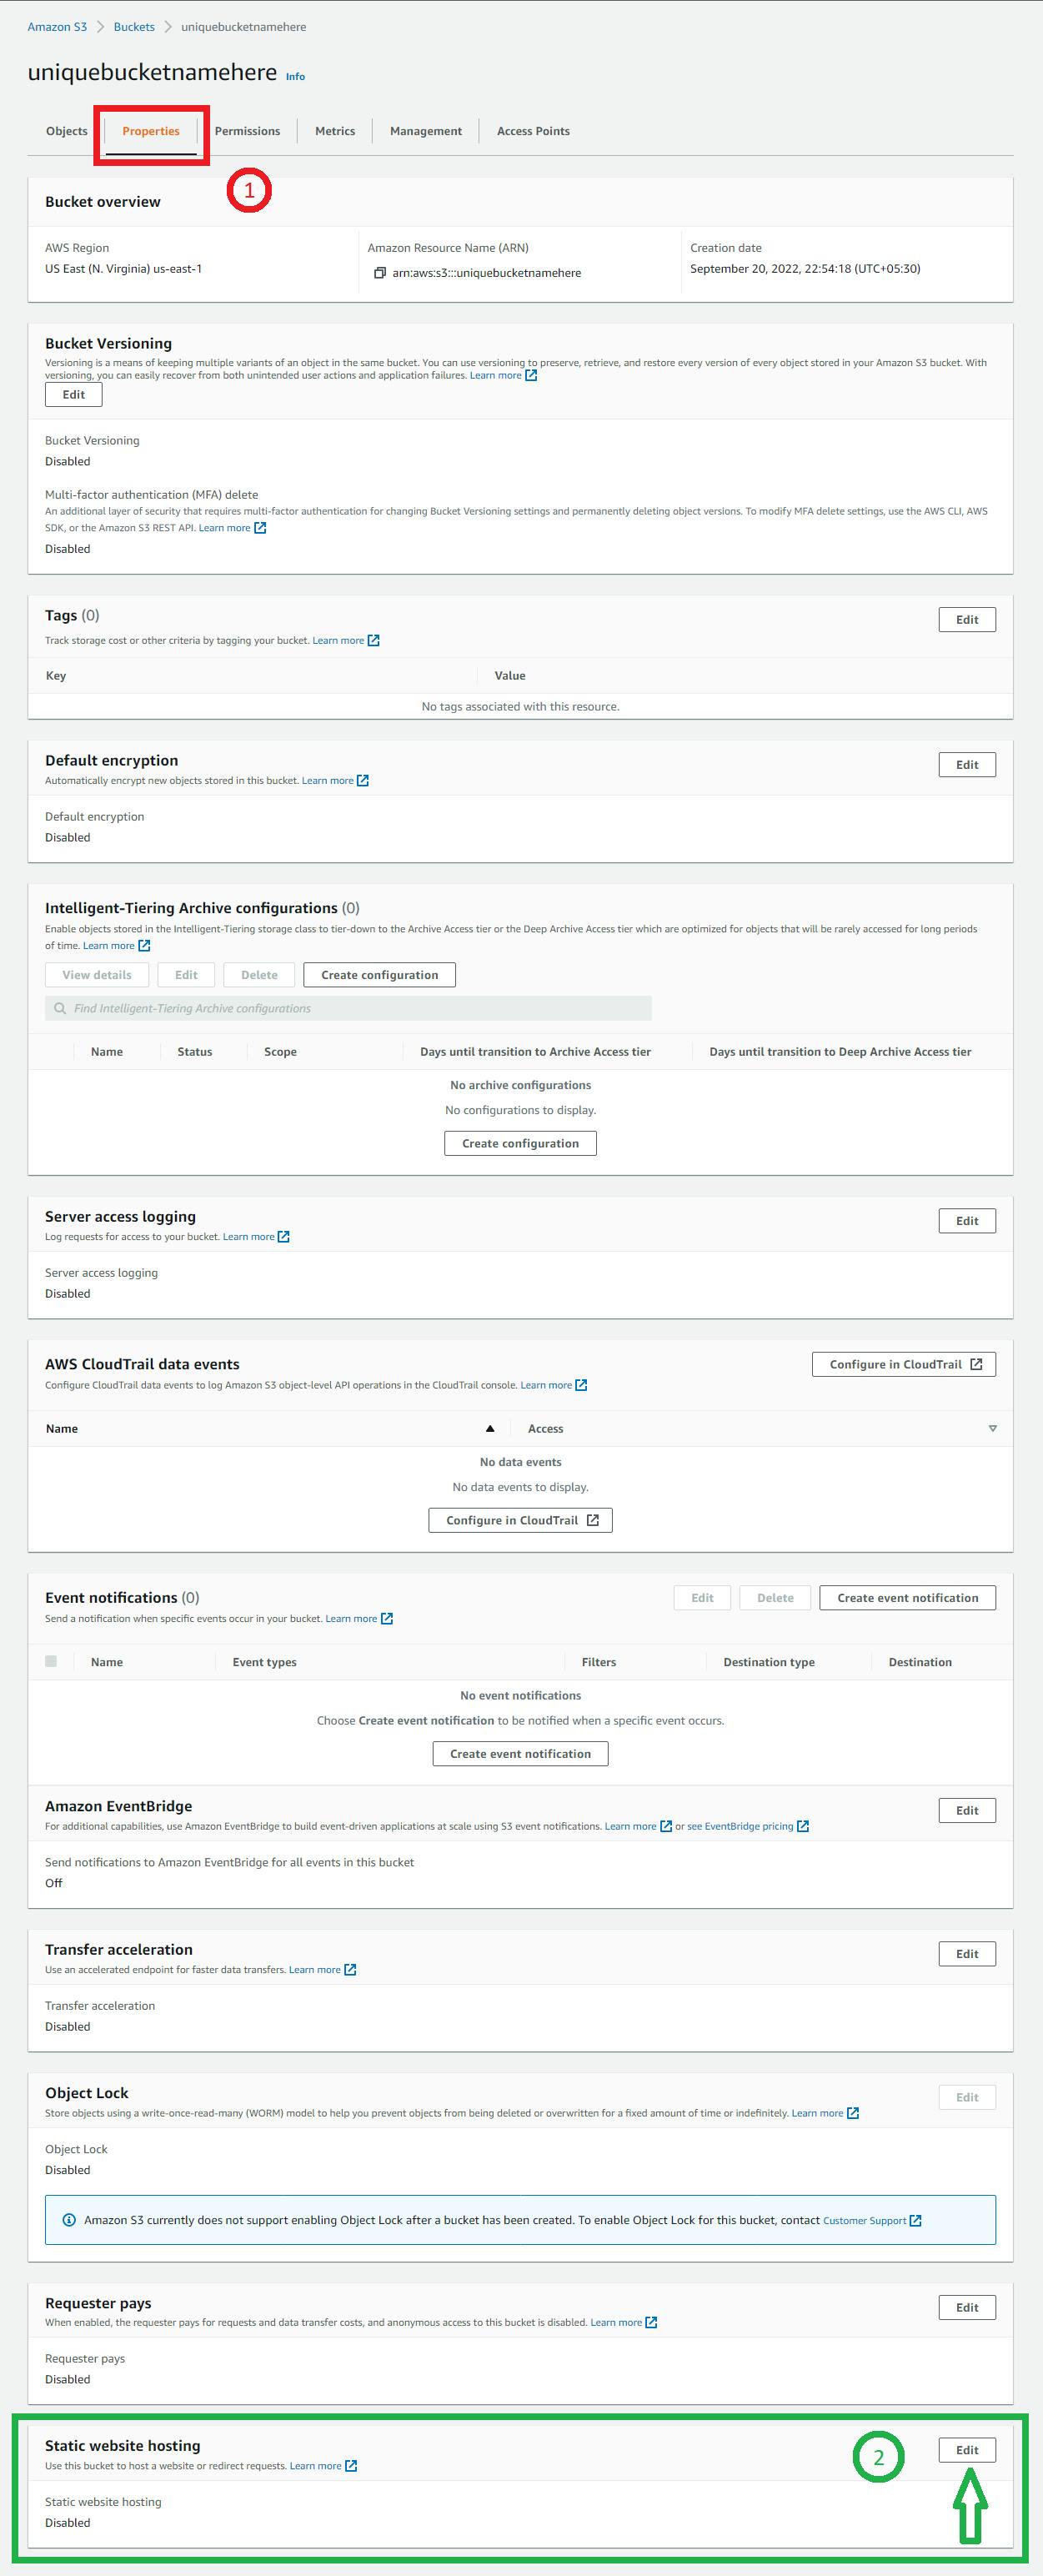
Once your bucket is open, you can see the option of Properties just below your bucket name. Click on Properties and scroll down till the bottom of the page.
The last division will be titled as Static website hosting. You can observe an Edit button in that section. Click on Edit
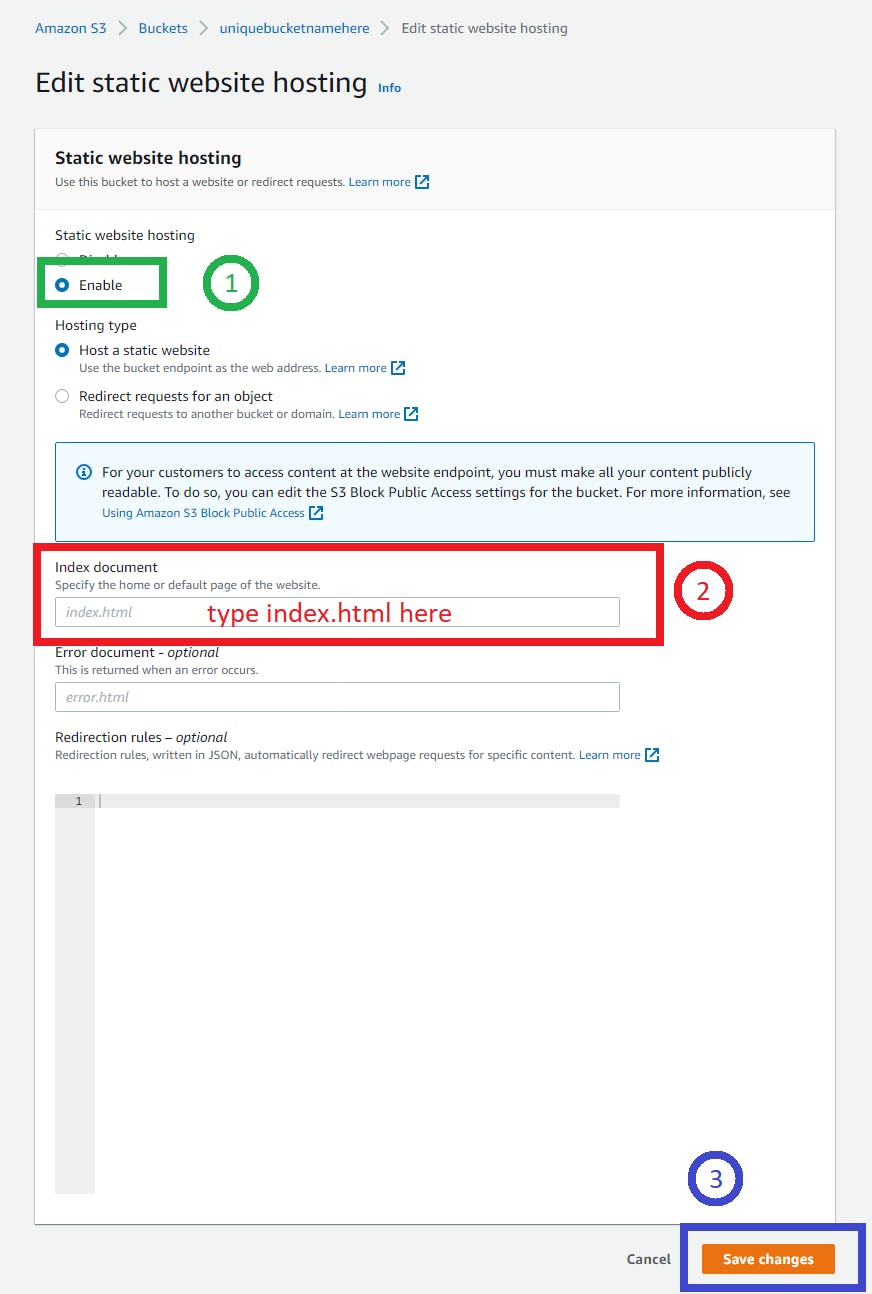
After clicking on the edit button, the Edit static website hosting page will come up.
Shift the radio selector Enable the state
Under the Index document, type index.html
Proceed to click on Save changes
The quick fix to 403
Head over to the Permissions section of your S3 bucket.
Scroll down and you will the section Bucket policy. Click on the Edit button under this section.
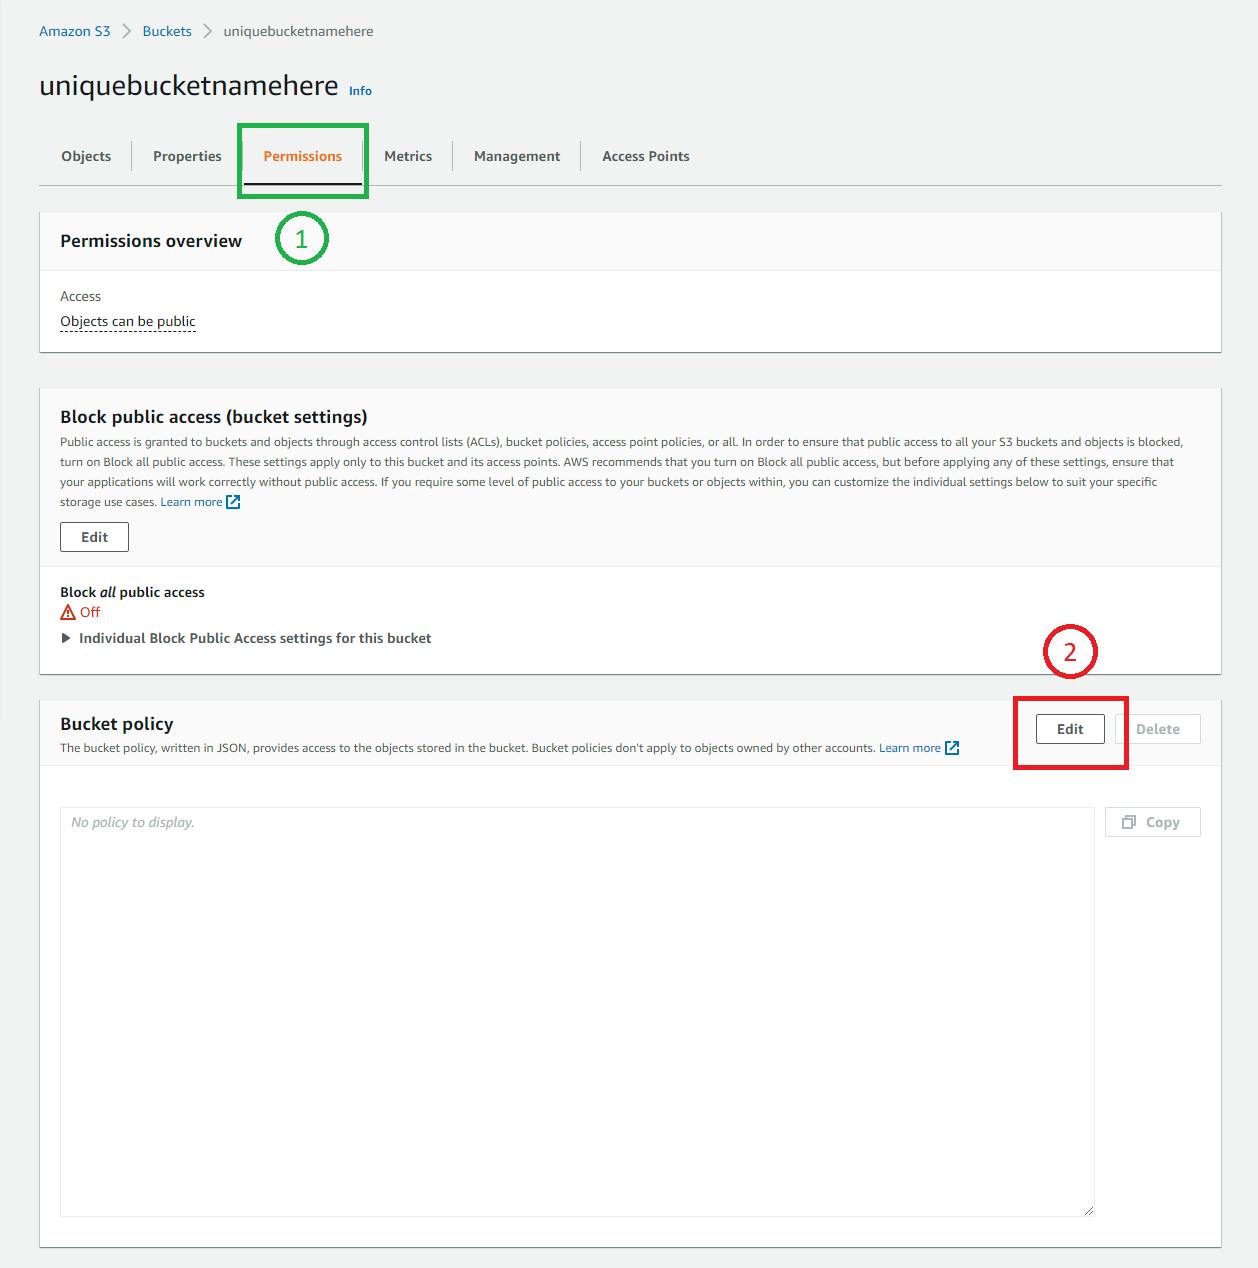
You will be redirected to the Edit bucket policy page. A piece of code needs to be added here:
{
    "Version": "2012-10-17",
    "Statement": [
        {
            "Sid": "PublicRead",
            "Effect": "Allow",
            "Principal": "*",
            "Action": [
                "s3:GetObject",
                "s3:GetObjectVersion"
            ],
            "Resource": "arn:aws:s3:::YOUR-S3-BUCKETNAME/*"
        }
    ]
}
Replace YOUR-S3-BUCKETNAME with the name of your S3 Bucket.
Click on Save changes.
Go back to Properties. Scroll down to the bottom till you reach Static website hosting section. Click on the URL.
Upload the zip folder of the website in the S3 bucket
To understand how this website is running on an EC2 instance, take a look at the following points:
I uploaded the site template zip folder to an S3 bucket.
Then, I accessed the S3 zip folder on the EC2 instance using a command.
curl -O public-link-of-the-zip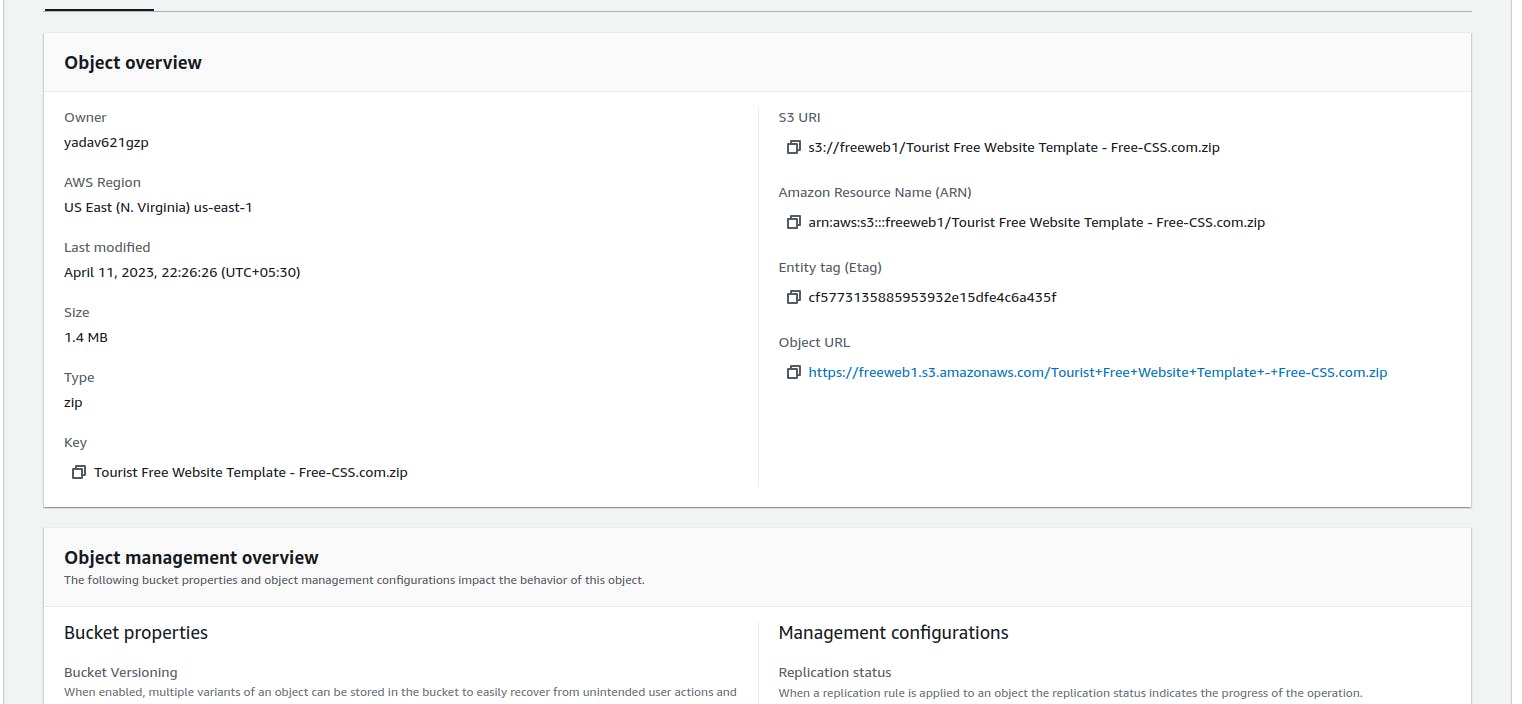
To run the HTML (index.html), I am using the lite-server tool. This tool runs the site directly on the server without any breakpoints.
Below are some images showing the public IP address of the instance and its exposure on port 3000. You can configure the security group in EC2 to achieve this.
And voila, your Static Resume Website is hosted.

GitHub Link - https://github.com/Vikash-8090-Yadav/Cloud-A2Z-Devops/tree/main/EC2%2BS3